What gives some flooring a more premium look? When you’re after a floor that looks stylish and professional, but do not want to pay out a fortune on labour costs, it can be a little problematic. Many beginners encounter issues with rain surfaces, warped cutting boards & damaged surfaces. People often develop wrong techniques that cause these mistakes. Only install SPC click vinyl flooring with proper planning, detailing, and care. This helps overcome these issues.
How to install spc flooring? You can refer to this spc flooring installation guide for simple steps. Discover the two main varieties of SPC flooring and how to appropriately use them. It is useful for new users as well as experienced users. Moreover, you will come across the right tools, an array of smart tips, and easy methods that will help you avoid mistakes and achieve a smooth, strong, and long-lasting flooring finish without stress.
The full form of SPC is Stone Plastic Composite. It is a strong and durable rigid core waterproof vinyl flooring designed for long-term use. This flooring uses a click-lock system where the planks snap together without glue & nails. It makes installation fast and easy. SPC flooring is stable and performs well in the home as well as busy commercial spaces because of its solid structure.
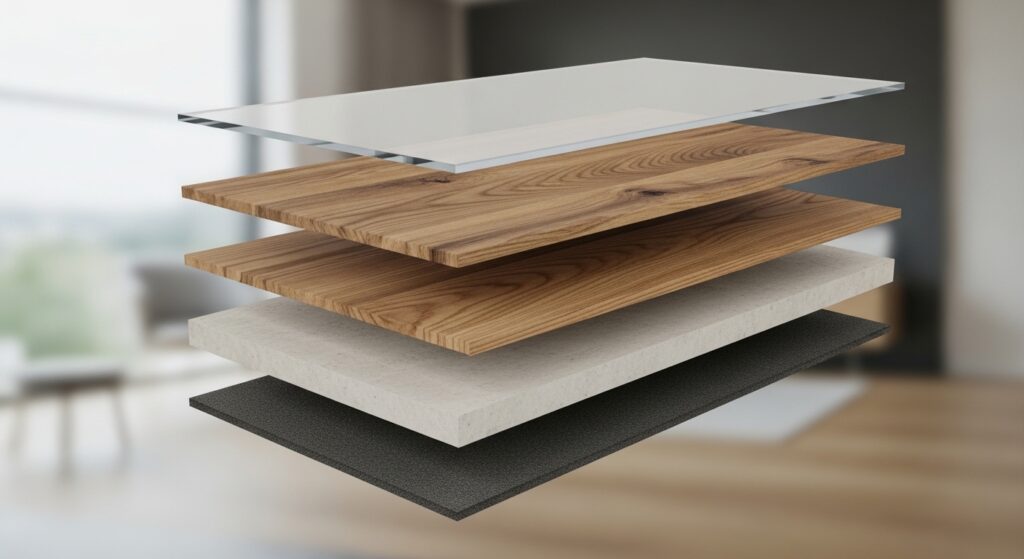
The layers of SPC flooring act together to strengthen it and protect it from damage. The top wear layer prevents scratches and protects against damage. The design layer beneath that gives a very realistic wood or stone look. SPC core is rigid to add stability & the backing supports the same. Due to its layered construction, it stays resistant to moisture, pressure & wear.
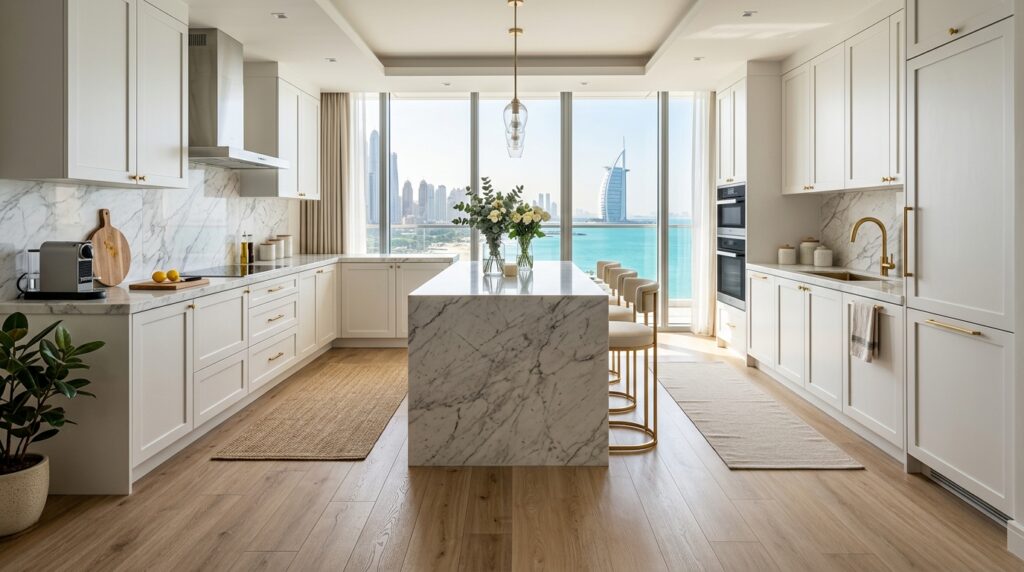
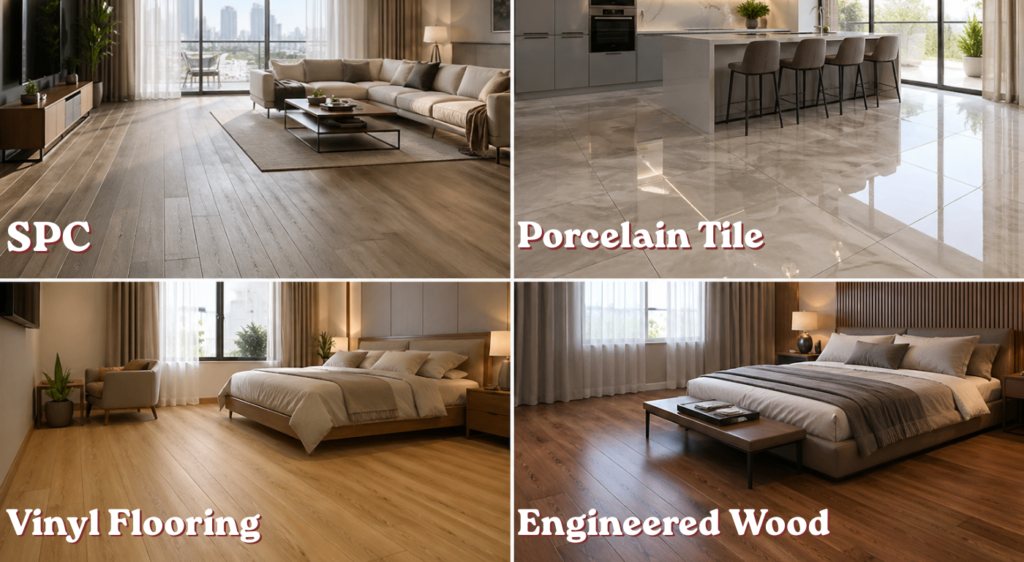
Due to its durability & waterproof nature, SPC flooring is used in different places. It is more than suitable for living rooms, bedrooms, kitchen & bathrooms of a house. Shops, offices, and busy outdoor areas make suitable commercial spaces as well. A great option in basements and other locations where flooring fails, as it is quite resistant to wetness.
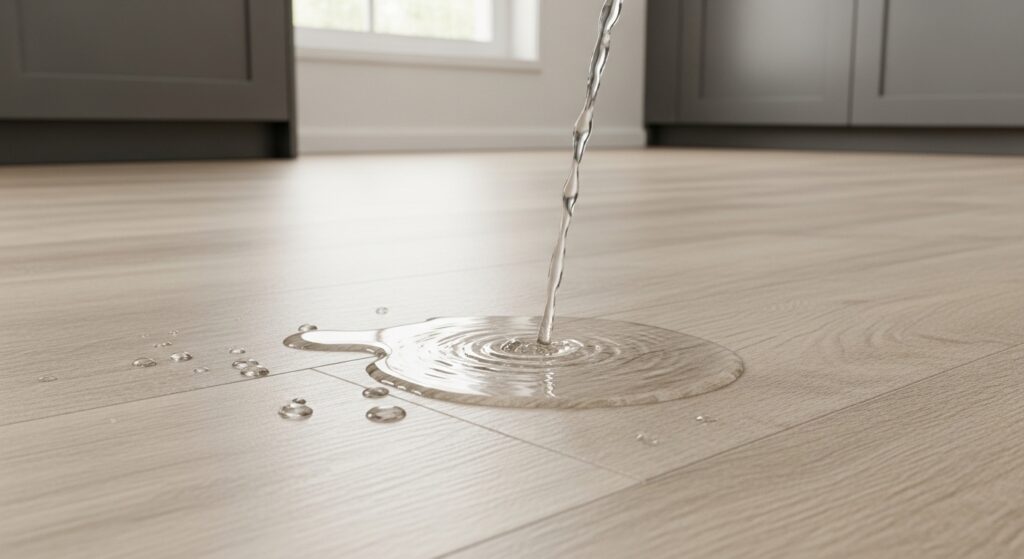
SPC Click Vinyl flooring offers a myriad of practical benefits, making it one of the best modern flooring options for the new-age home. This material cannot get wet. It makes the kitchen, bathroom & basement an ideal choice. Don’t worry about your heavy furniture or scratches from pets anymore, thanks to this area rug. The solid interior panel will withstand heavy foot traffic. Stylish wooden or stone designs are available for your choice. Great wooden flooring won’t take up a lot of your time.
- Perfect for damp areas such as kitchens, bathrooms, & basements for waterproofing.
- The carpet has a scratch-resistant surface to stop it getting marked by your pet’s claws, furniture legs & heels.
- A solid core construction enables this product to deliver great durability and withstand heavy-footfall traffic.
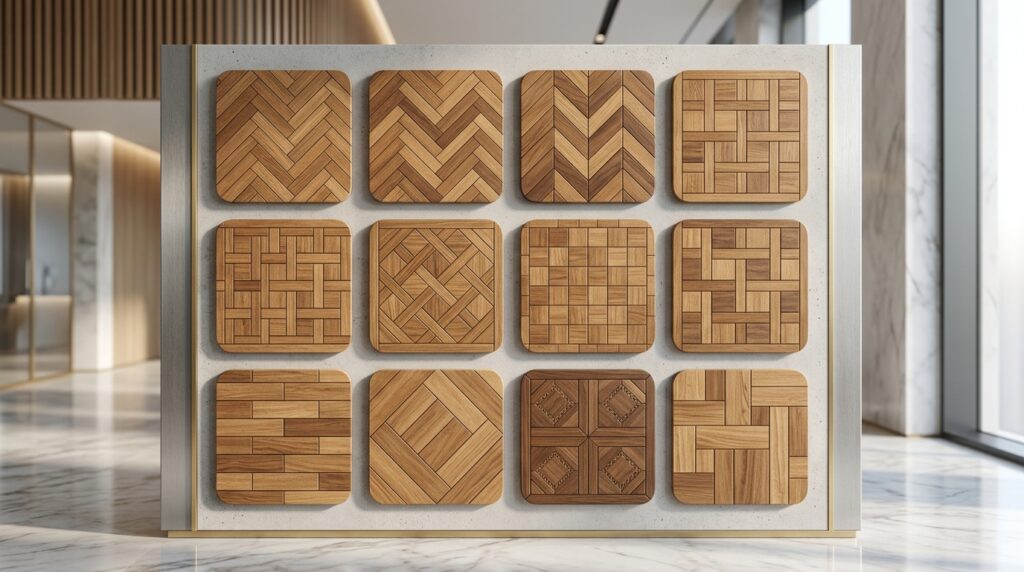
- Select chic wooden & stone pieces or stylish finishes that perfect your style.
- This requires little maintenance, meaning you won’t have to spend much time cleaning it.
SPC flooring is a kind of flooring that is attractive, durable, & practical for residential and commercial use.
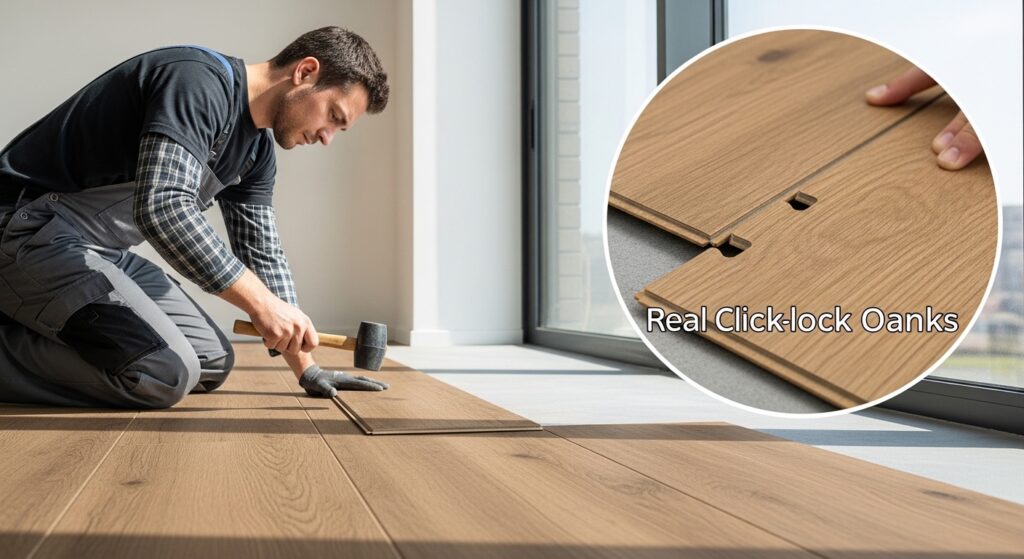
The click-lock method is the most common way to install SPC flooring. In this system, planks are made to snap tightly into each other. It makes a floating floor without using glue as well as nails. The process is simple & beginner-friendly. It also offers a strong & secure fit. This method helps achieve a clean and stable flooring finish for homes and offices.
The loose lay method is another installation option for SPC flooring. In this method, planks are placed directly on the floor without any locking system or adhesive. It depends on weight and friction to stay in place. It is faster to install but not very strong. In high-traffic areas, it may shift slightly and is less stable compared to other methods.
The click-lock system is usually the better choice for most projects. It offers stronger stability and keeps planks tightly fixed together. It also makes alignment easier during installation. The flooring lasts longer and performs better in daily use. That is why professionals prefer it for homes, offices, and commercial spaces where durability and neat finishing are very important.
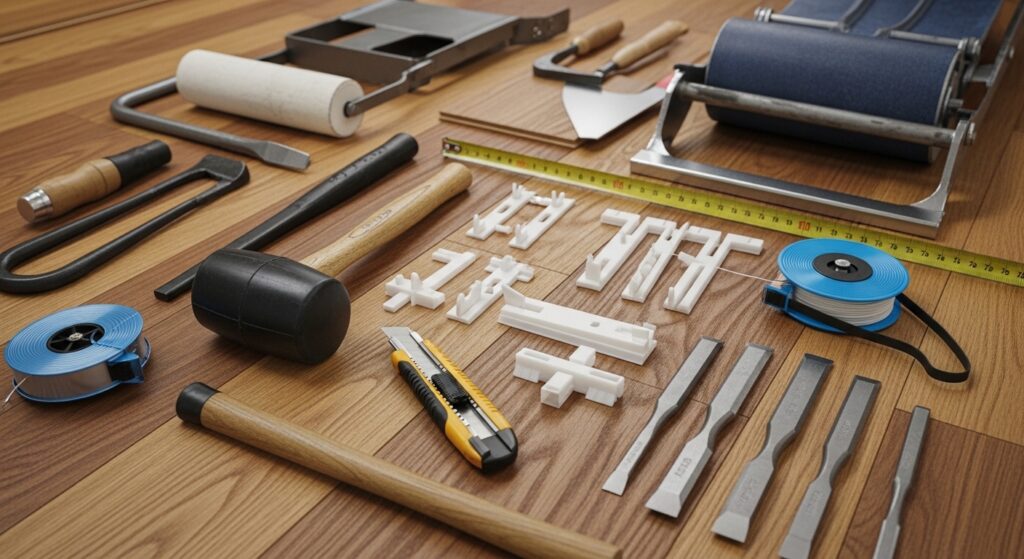
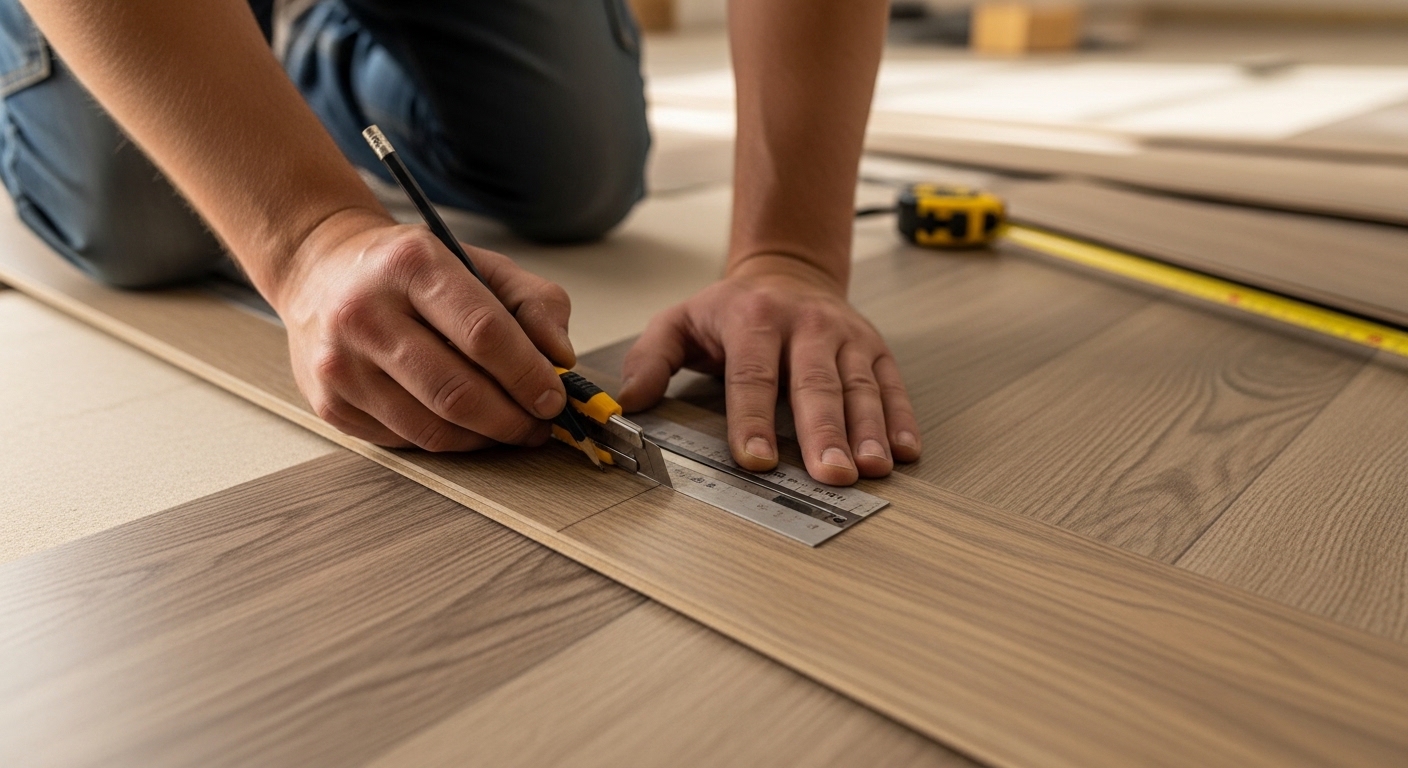
It is important to use clean and sharp tools before SPC installation. This makes it easier to use & more accurate. The basic tools needed for the installation of modular flooring are measuring tape, utility knife, rubber mallet, spacers & tapping block. Planks will be properly measured, cut & fitted with the right tools. The installation process can go smoothly & you’ll be able to achieve a nice, neat job if you have the right tools.
For a successful spc click vinyl flooring installation, the materials are also very important. The main flooring material will be SPC planks. You may need underlayment for comfort and sound control. Transition strips help connect the different areas of the floor. The materials provide a compact, stable, and chastened floor finish, thereby constituting a solid floor. This space can withstand the test of time through carefully chosen materials.
Some additional items might not be necessary, but the extra assistance will never hurt. Knee pads let you work on your knees for longer periods of time comfortably. The saw cuts the planks in a firm manner. Select these tools to enhance safety and precision. Select these tools to enhance safety and precision. Select these tools to boost safety and precision. Using the correct things & optional tools will save time & prevent mistakes while producing a perfect overall installation.
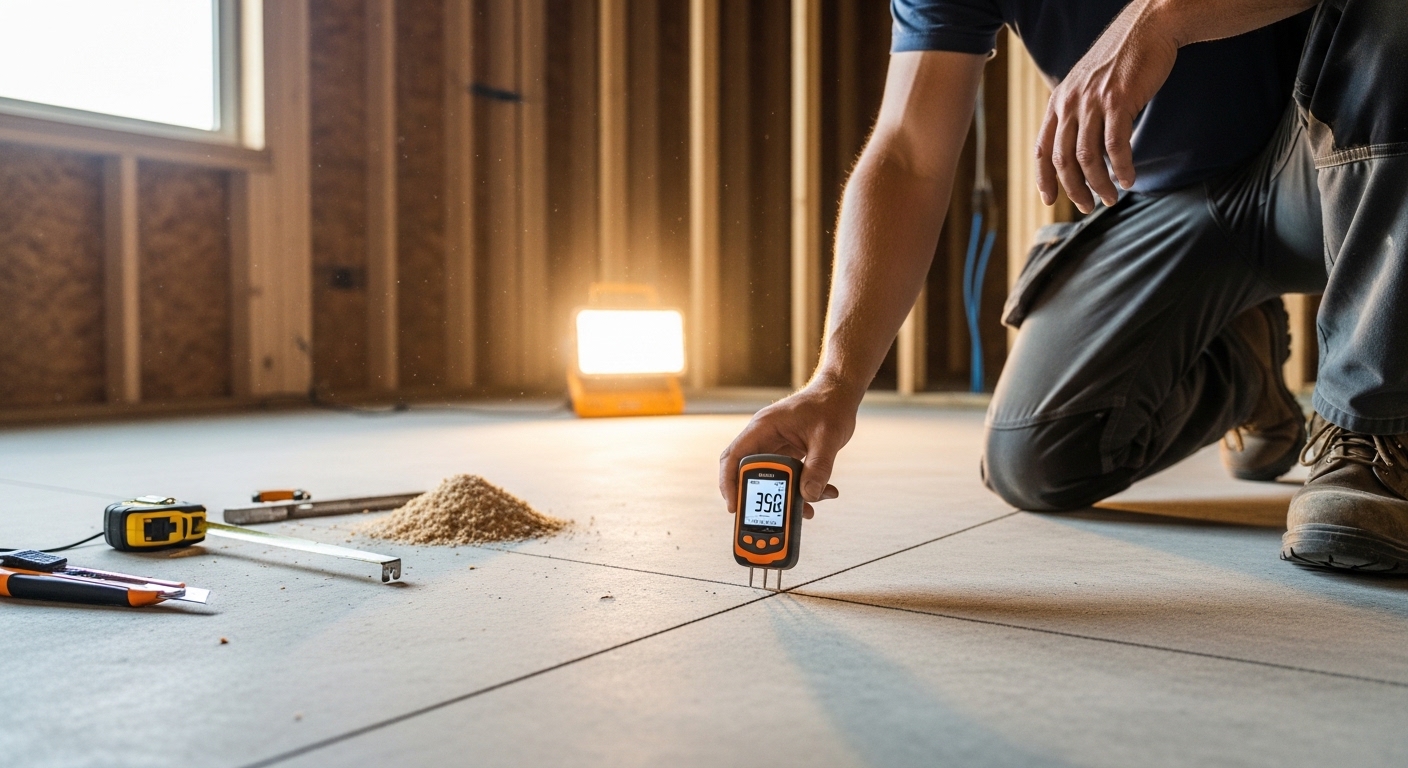
The moisture of the base layer should be checked before laying SPC flooring. Moisture damage to the flooring occurs with prolonged exposure. The force and life of the Earthquake might weaken. Testing can keep any moisture problems from occurring. To ensure that your floor is stable and lasts long, the base should be dry. Never skip this step in your installation work.
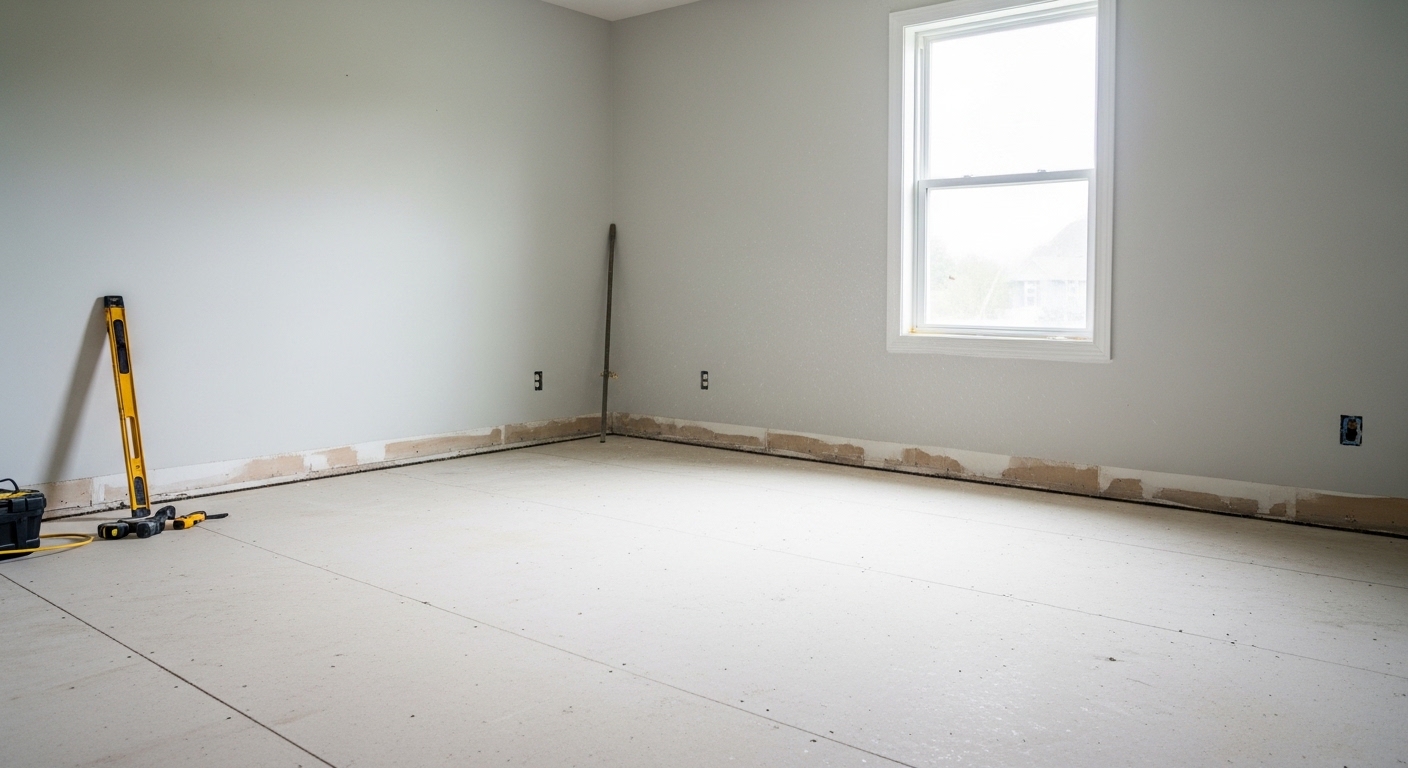
Before installation, the surface onto which the floor will be laid should be smooth, clean & level. Bumps, dust & unevenness can create issues later on. Alternatively, they may cause space between the planks or have a bad fit. The locks of SPC planks are very tight and stable on flat ground. If your base is prepared properly before you install your flooring, your flooring will be much neater and stronger, and will have a professional appearance.
The temperature of the room also plays an important role in SPC diy flooring installation. The process should remain stable at all times. Typically, the temperature for best results is 18 to 27°C. A temperature change can cause flooring to expand and/or contract subsequently. The fit and alignment may be impacted. A stable environment ensures proper settling of any flooring option for it to perform well in the long run.
Before starting the installation of SPC flooring, one must properly prepare everything. Good preparation prevents mistakes, delays, and unnecessary work later on. Smooth sailing can start next, once we have our base and tools ready. A clean professional finish can also be created by it. If you take some time out to prepare the site before installing a fence, you will save a lot of trouble. Better yet, you will get a more uniform installation that lasts longer.
- Wipe clean and dry the subfloor.
- Test the moisture level
- Make sure the surface is level.
- Assess the room correctly.
- Acclimate flooring planks for 24–48 hours
- Gather all tools and materials
- Plan layout direction
This preparation ensures a smooth & efficient installation method.
Donning some gloves is a simple yet crucial safety step for SPC flooring. Gloves help protect your hands against sharp edges and tools. Easier handling of materials is also aided by them. It allows you to do your work in safety and comfort, especially while moving, cutting, and fitting planks.
Knee pads allow you to work for a long time on the floor. Pain in the knees may start to occur as flooring installation begins because it is performed on one’s knees most of the day. Using knee pads will reduce pressure on your knees & help you do the job easily. It allows you to stay chilled out to focus on the job at hand & get it done without any hassle.
Always treat tools with respect. Always take care not to damage cutting tools. Rapid or careless movement can result in injuries. At every step, take your time and practise safe handling. A neat workspace helps avoid accidents. Having a clear area makes moving around easier, and it helps you work more safely and efficiently.
The time taken for the installation mainly depends on the size of the room and your experience. A small or standard room can be installed by a DIYer within four to eight hours. When you’re just starting things. It might take a longer time. When you take your time, you can avoid mistakes. Time and effort can be saved with planning.
The overall expense varies with the quality of flooring, tools, and additional materials. SPC Planks, underlayment & trims all add up to cost. When you do it yourself, the installation is cheaper since you don’t pay for labor costs. It, however, takes time and effort. With good planning, you can manage your costs while getting good results.
If you hire professionals, then the total installation cost will increase. However, it makes you less stressed and gives you a clean, perfect finish. Professionals complete work more quickly and avoid errors. A good way to save yourself some money is DIY. If guided correctly, one can still achieve strong and neat flooring with a professional look.
SPC flooring installation is easier when you use the right steps in order. Every single step is important to getting a strong, smooth finish. Getting professional results in hairstyling is easy with good care and methods. By following this guide, you won’t make mistakes during the flooring project application.
Before installation, inspect this room. Examine the floor for any signs of dampness or leaks. Moisture can cause serious trouble to SPC flooring in the future. Moisture should not be present on subflooring. If you can, use a moisture meter. If the surface being installed has moisture, it will affect the quality.
Tips:
- If possible, utilize a moisture meter.
- Do not install on wet surfaces.
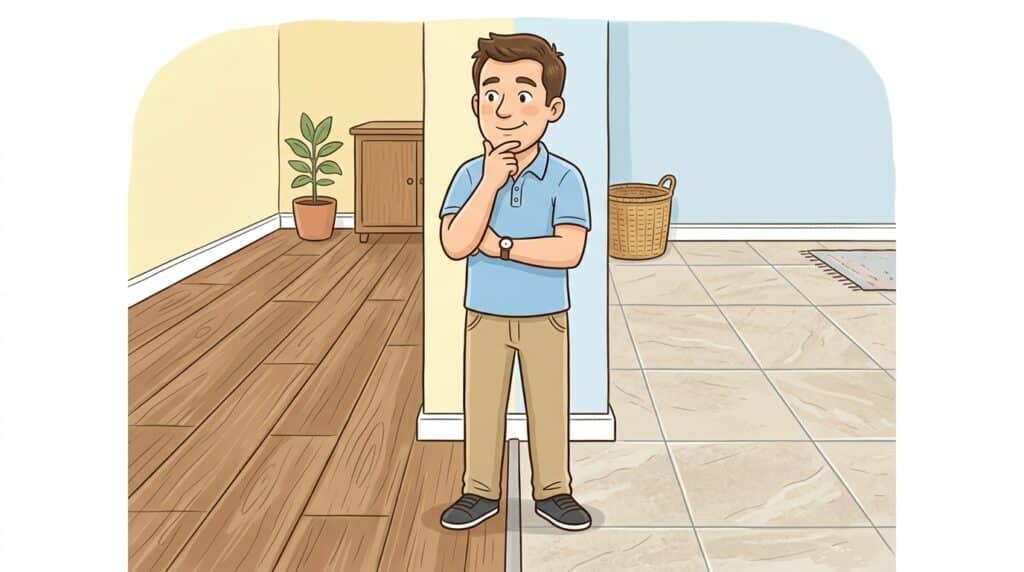
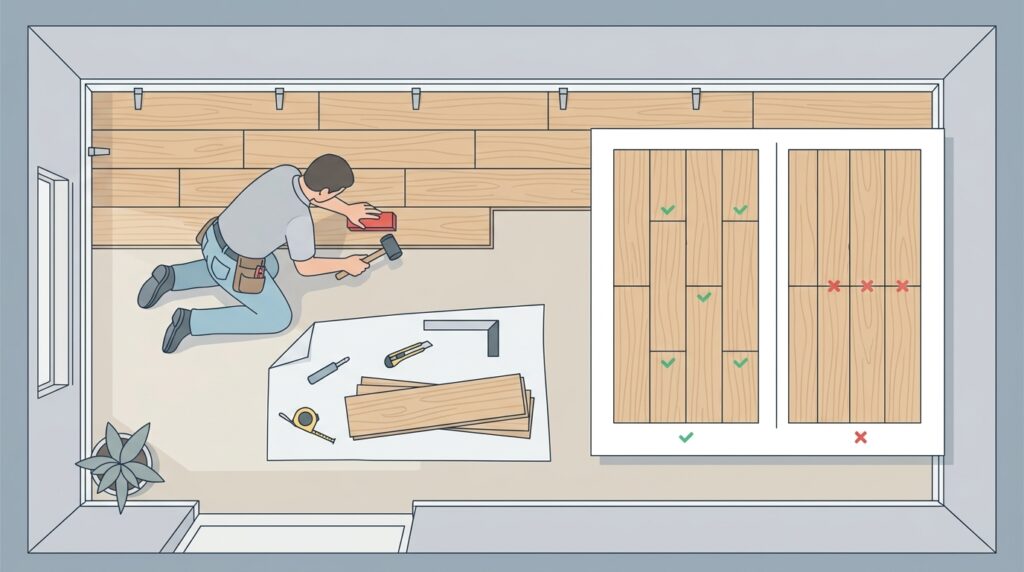
Before laying planks or any furniture, prepare the layout. The shape of your room and light flow will determine the direction. Most people attach boards to the longest wall. The room looks larger and more harmonious because of this. Begin with the area of the room that is most visible. Effective planning minimizes trimming tasks and enhances the overall fruits’ appearance.
Pro Tip: To ensure a tidy and balanced look, begin with the wall you see first.
Clear the room of all furniture, baseboards & moldings. This helps clear your workspace and maintain openness. Clean and dust the floor before commencing the craft activity. Having a large area will allow easy movement and correct positioning of planks. It additionally assists in achieving clean edges with a more professional flooring finish.
A level subfloor is essential for proper installation. Even little bumps can cause unevenness in the floor and gaps.
Put leveling compound in low spots, if needed. Sanding will smooth over any high spots. Time spent here will equate to a perfect result.
SPC planks must be kept in the room for a minimum of twenty-four to forty-eight hours. By doing this, the material will adapt to the temperature and humidity present in that room. It minimizes the likelihood of expanding or contracting post-installation. Keep the room temperature stable during this part. Proper acclimatization allows the flooring to settle and perform better.
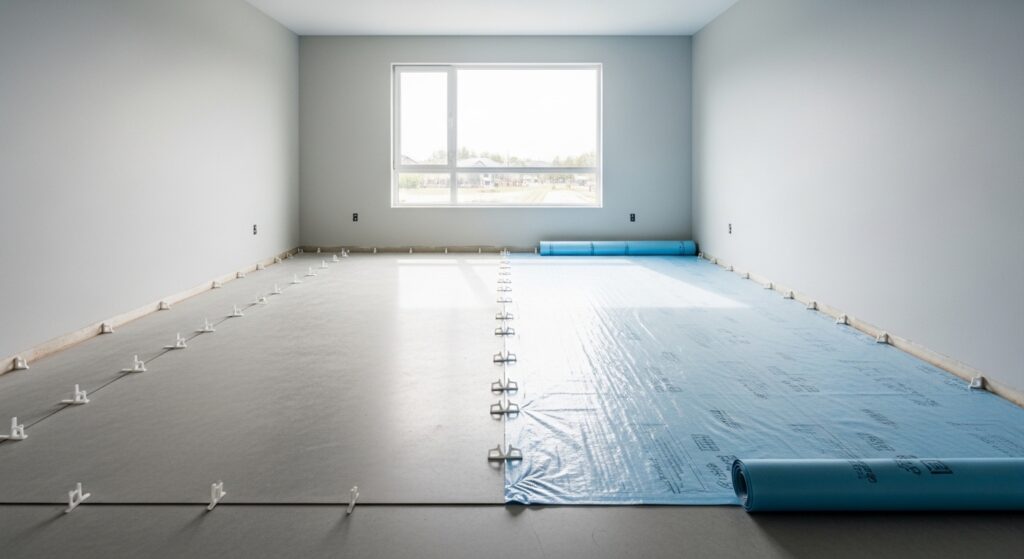
Look for an attached underlayment for your SPC flooring. If not, place a different underlayment layer before laying planks. This creates a quieter and more comfortable experience. Moreover, it provides the flooring with additional support. The underlayment should be perfectly laid without wrinkles. This step enhances the flooring’s overall feel and performance.
Start installing the first row along one wall of the room. Use spacers to maintain a proper expansion gap between the wall and planks. Make sure the first row is perfectly straight and aligned. This step is very significant for the whole installation. If the 1st row is uneven, the rest of the floor will not fit properly.
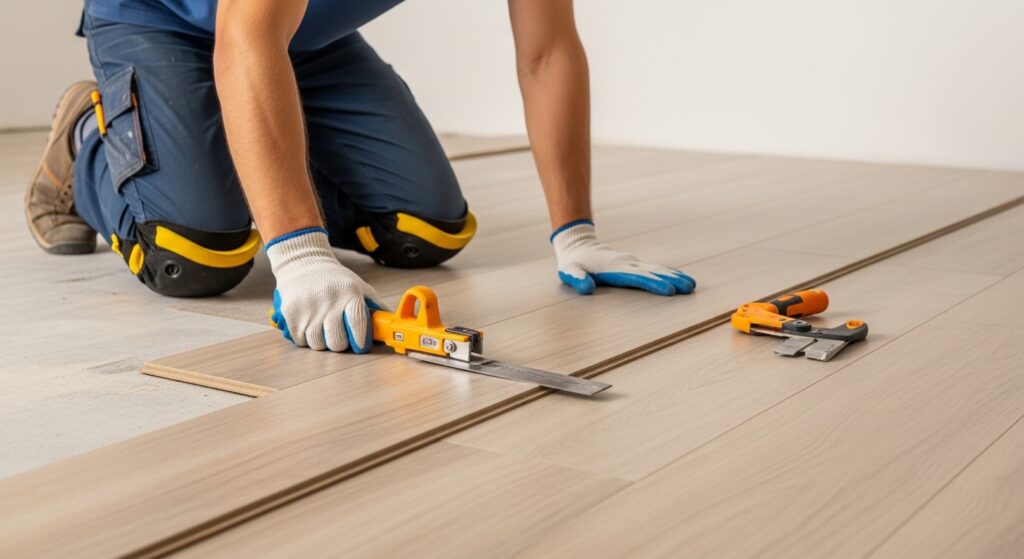
Measure the required size before cutting any plank. Use a utility knife or saw for accurate cutting. Mark the cutting line clearly for better results. Cut slowly and carefully to avoid rough edges. Proper cutting reduces waste & improves fitting. Always double-check measurements. When your plastic flooring displays clean edges, this can help achieve a neat and professional look.
Tips:
- Mark clearly before cutting
- Cut slowly for clean edges
Install each plank at an angle and push into the previous one. Now press it down till you hear a click. This creates a tight and secure fit between planks. Use a tapping block if needed for better locking. Do not force the planks too hard. Gentle pressure helps avoid damage and ensures proper installation.
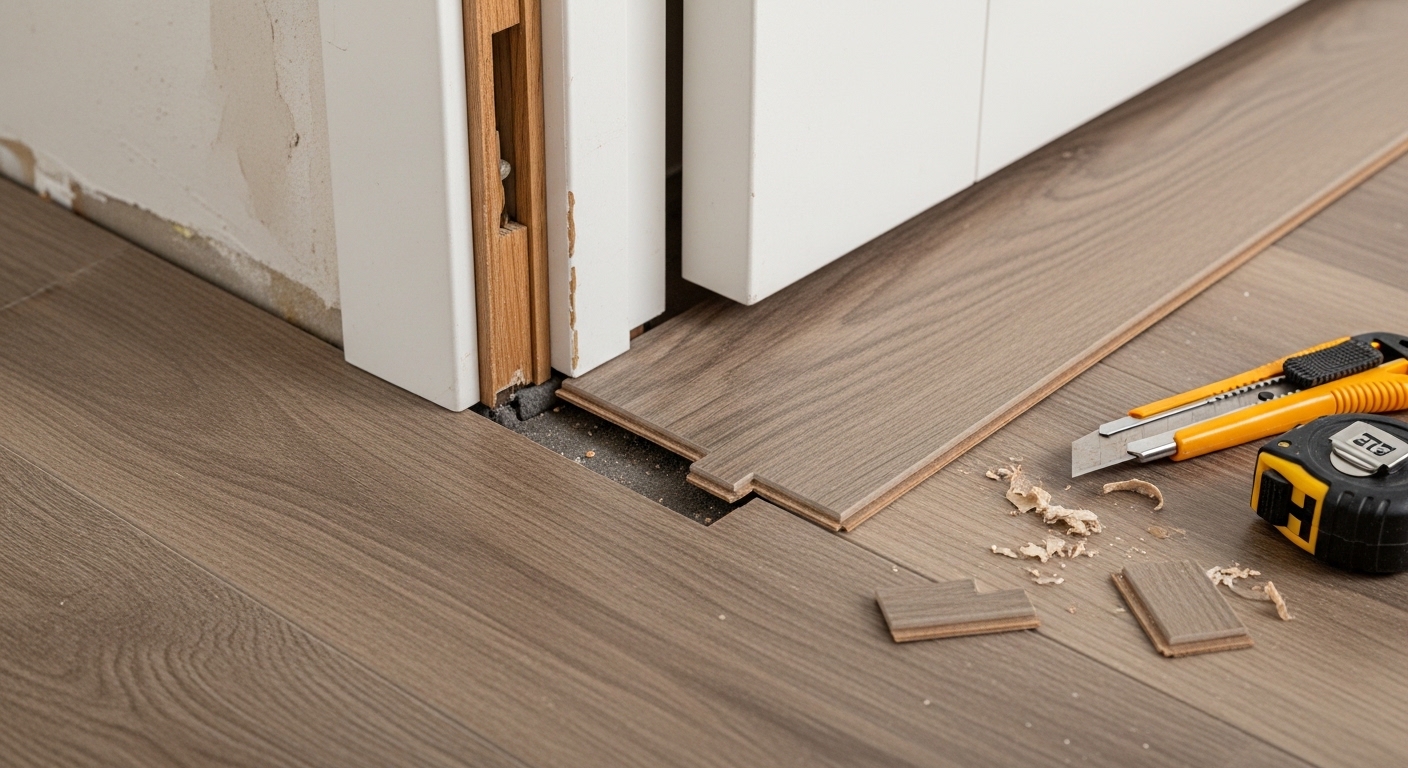
Cut planks carefully to fit around corners, pipes, & door frames. Measure each area properly before cutting. Use the right tools for accurate shapes and clean edges. Take your time when working around obstacles. Small mistakes can affect the final look. Proper fitting in these areas gives a clean and professional finish to your flooring project.
Measure the remaining space for the final row carefully. Cut the planks to fit properly without forcing them. Make sure you maintain the expansion gap along the wall. This gap allows the flooring to expand and contract naturally. Do not skip this step. A proper final row ensures stability and completes the flooring installation correctly.
Place trims and molding to cover the expansion gaps at the periphery. It lends your floors a polished and neat finish. Ensure all edges are clean and tight. After fitting the screen, be sure to clean the surface! Don’t put heavy furniture back for at least twenty-four hours. This allows the flooring to settle & hold its shape.
Closing Tip: After you install it, don’t place heavy furniture on it for 24 hours.
Before fitting the final row, measure the leftover space carefully. Fit the planks without forcing them into position. Always leave a small expansion gap between the planks and the wall. The above gap is very crucial. This enables the flooring material to expand and contract according to temperature changes and prevents future damage or lifting.